Projects
Detailed breakdowns of my most recent engineering projects and decisions.
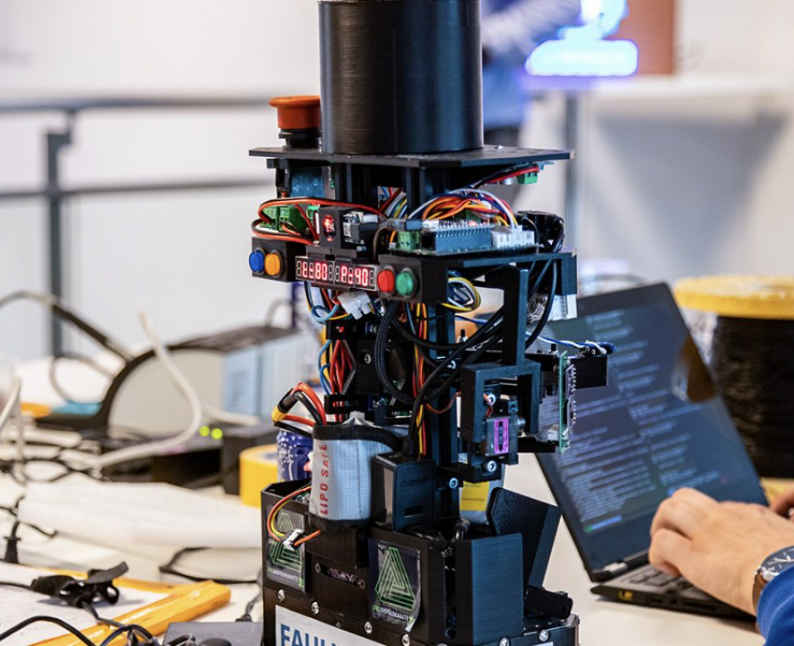
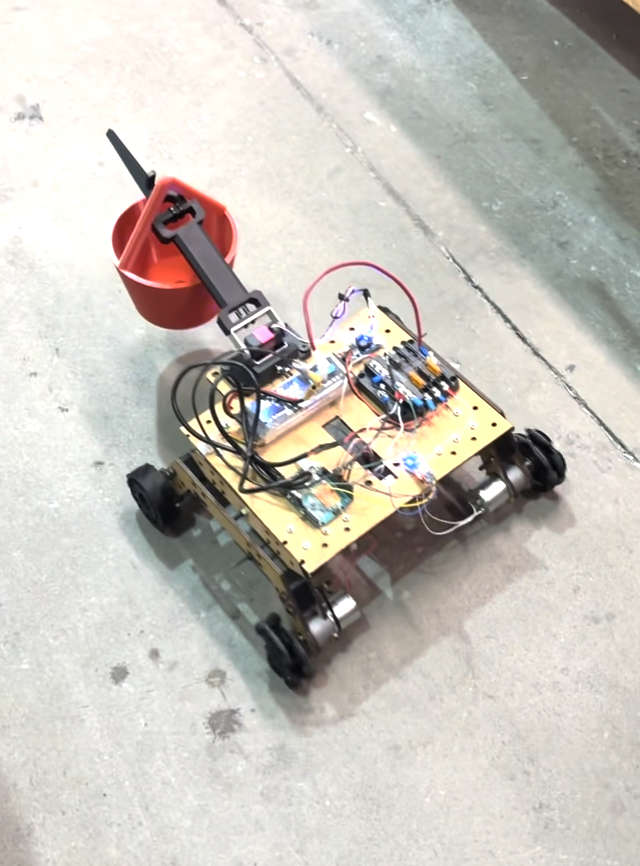
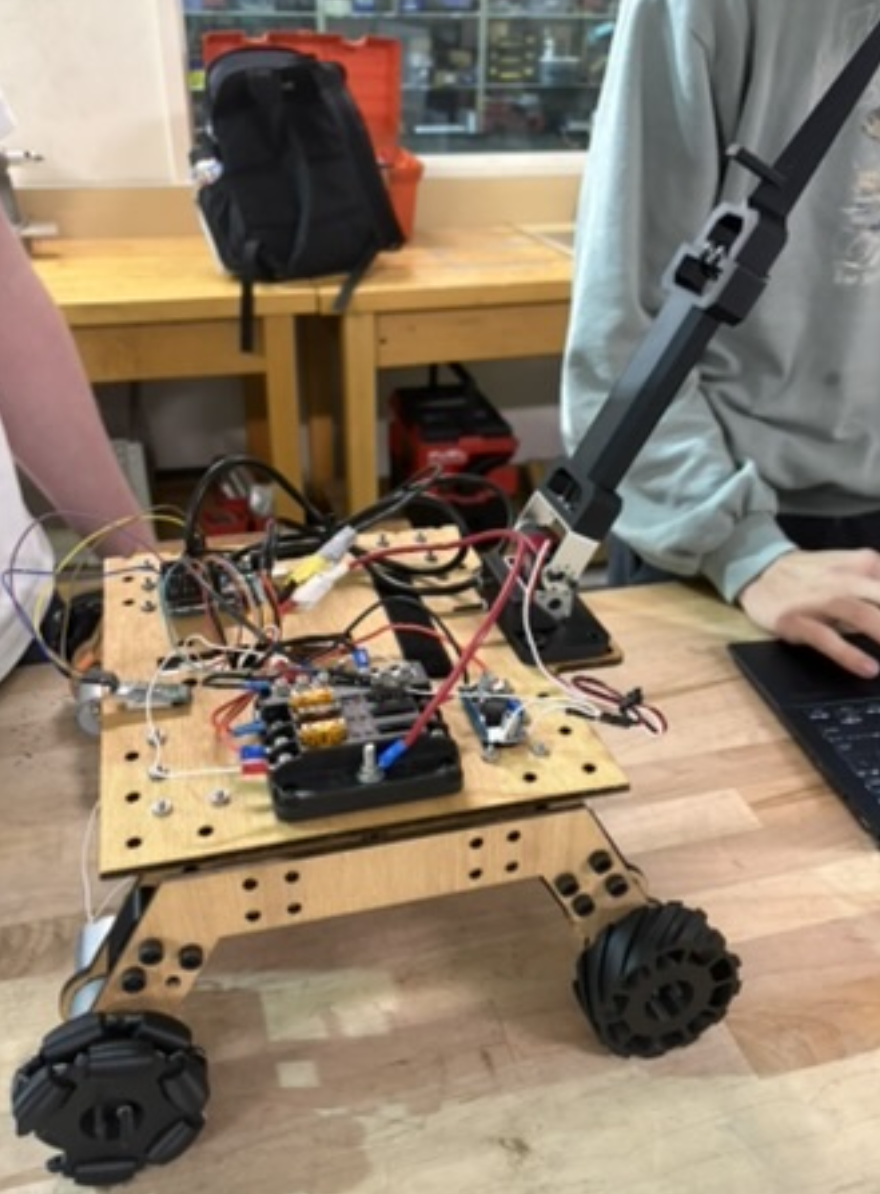
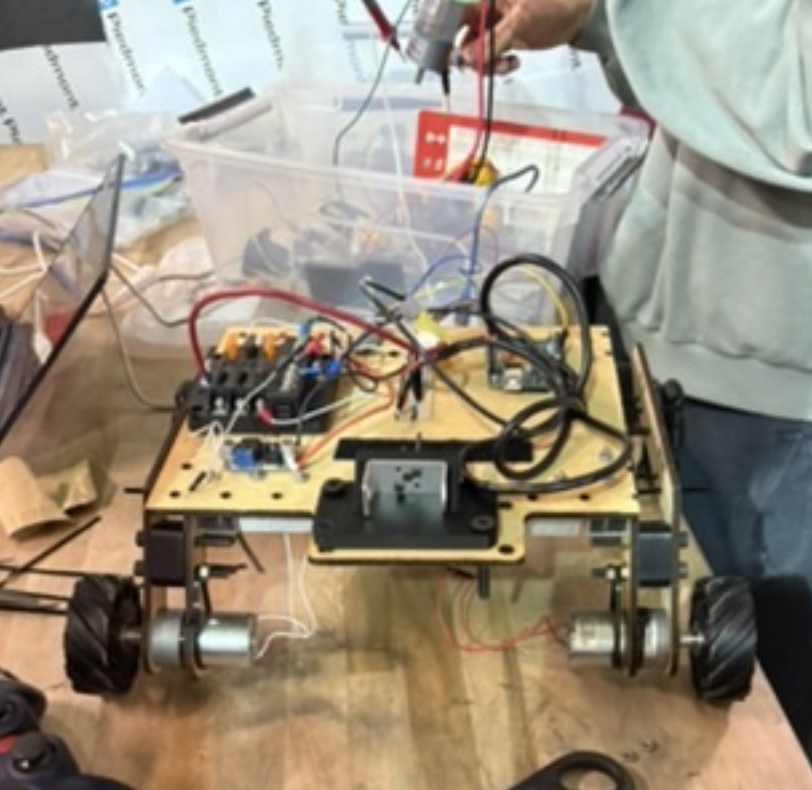
RC Rover
This project was part of my onboarding process for one of my clubs, where we worked in a group to design and build a rover from the ground up. The purpose wasn’t just to assemble a robot, but to create a system capable of completing specific tasks at the end as part of a small competition. We had to make sure our rover could move reliably and interact with its environment, which pushed us to think beyond just building and focus on functionality. Throughout the process, I worked with my team on assembling the chassis, wiring the electronics, and testing performance. It was a hands-on introduction that helped me understand how different components come together in a real, working system.
Technical Details
The rover was built on a wooden chassis with a four-wheel drive system powered by DC motors, which provided stability and consistent movement. We used an Arduino-based microcontroller to control the system, sending signals to an L298N motor driver that handled the higher current required by the motors. Power was supplied through a battery pack and distributed using terminal blocks, jumper wires, and a breadboard for easier prototyping and modifications. We also used basic switches to control power and functionality during testing. The robotic arm was driven by multiple servo motors, which were controlled using PWM signals from the Arduino. Integrating the arm required careful coordination between hardware and control signals. Since all wiring was done manually, it gave me a much better understanding of how each component connected and how signals and power flowed through the system.
Reflection
One of the biggest challenges was troubleshooting the wiring, since even a small mistake like a loose connection or incorrect pin placement could stop the entire system from working. There were several instances where we had to carefully trace wires and test components like the motor driver, Arduino, and servos individually to isolate the issue. I also learned how important proper power distribution is, especially when multiple components are running at the same time and drawing different amounts of current. Keeping the wiring organized made a huge difference in debugging efficiency. Working in a group also helped me improve communication and learn how to divide tasks effectively. Overall, I became much more comfortable working with real components and developed a more structured approach to problem solving instead of relying on guesswork.
PID Motion Sensor
This project was part of a high school engineering assignment where we were introduced to control systems and basic feedback loops. The goal was to design a simple system that could detect motion and respond in a controlled way, rather than just turning something on or off. I worked on building a small setup using an Arduino and a motion sensor, where the output would change depending on detected movement. This project was meant to help us understand how real systems adjust based on input, similar to how automated systems work in everyday applications.
Technical Details
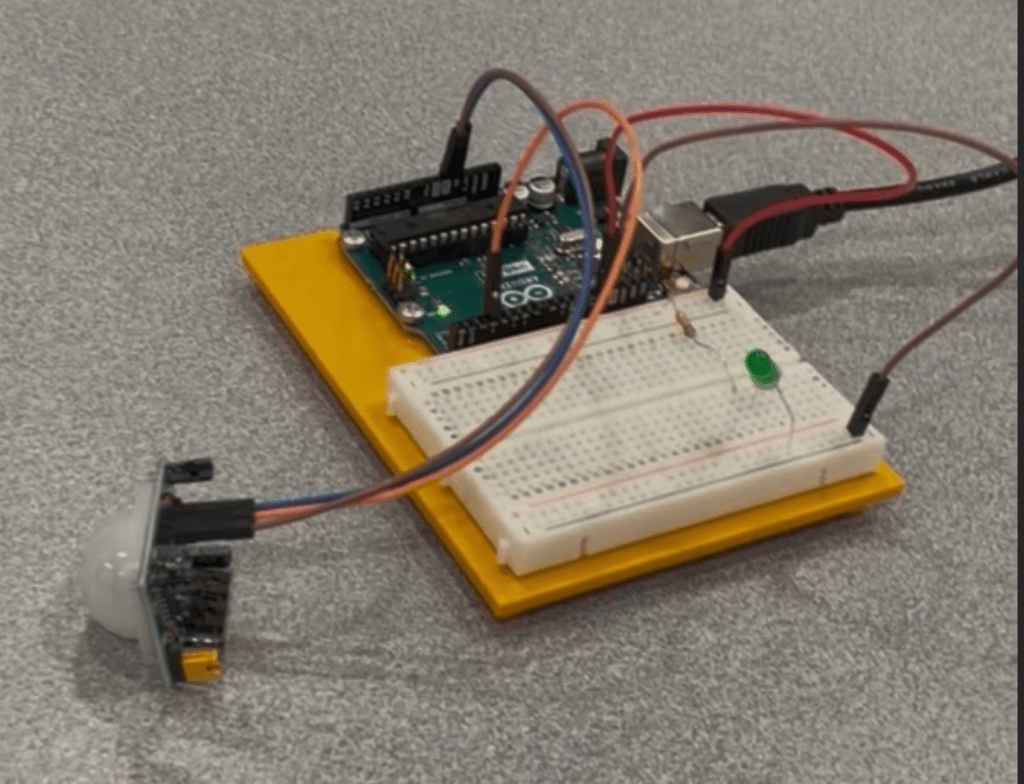
For this project, I used an Arduino Uno as the main controller along with a PIR motion sensor to detect movement. The circuit was built on a breadboard using jumper wires, and I included an LED as the output to visualize the system’s response. The Arduino read signals from the sensor and used simple logic to adjust how the LED behaved based on motion detection. While it wasn’t a full PID implementation, it introduced the idea of responding to input in a controlled and adjustable way. Writing the code helped me understand how sensor data is processed and translated into physical output.
Reflection
One of the main challenges was getting the sensor readings to be consistent, since the motion sensor could sometimes be sensitive or delayed. I had to test different setups and adjust the code to make the response more reliable. This project helped me better understand how sensors interact with microcontrollers and how small changes in code can affect behavior. It also improved my confidence working with breadboards and basic circuits. Overall, it gave me a solid introduction to feedback systems and how engineers design systems that respond to real-world inputs.
Discovery Project
The initial goal of this project was to design a simple temperature sensing system that could monitor indoor conditions more accurately than relying on external weather data. Outdoor temperature readings often do not reflect actual indoor environments due to factors such as insulation, sunlight exposure, and air conditioning. To address this, I aimed to build a compact Arduino-based system that could measure real-time room temperature and display it clearly. Beyond just measurement, the project was intended to introduce concepts of sensor interfacing, analog signal processing, and basic feedback behavior in embedded systems.
Project Progress
Materials:
Arduino Uno – Served as the main microcontroller to read sensor data and process outputs
Temperature Sensor (TMP36) – Used to measure ambient temperature through analog voltage output
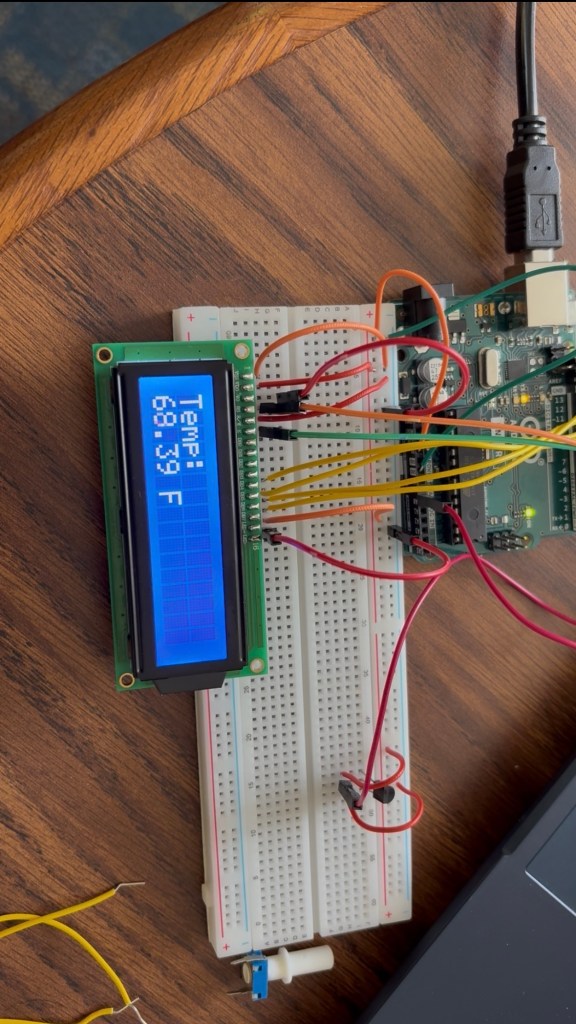
LCD Display (16×2) – Displayed real-time temperature readings
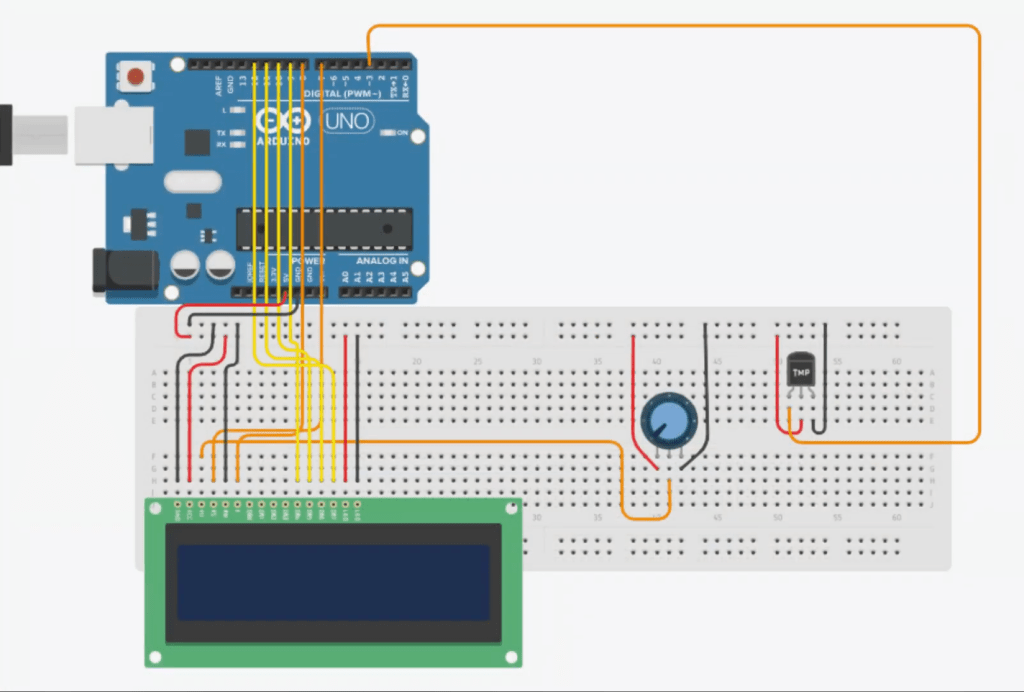
The project began with researching temperature sensors and basic Arduino interfacing techniques. I used online resources to understand how analog temperature sensors convert physical temperature into voltage signals. Based on this research, I created an initial circuit schematic in Tinker cad to visualize the design before physically building it. After finalizing the design, I transitioned to hardware implementation using an Arduino Uno, a temperature sensor, and a breadboard setup. The initial focus was on assembling the circuit correctly and ensuring proper wiring. Once the hardware was assembled, I began writing and testing Arduino code to read analog values and convert them into temperature readings.
As development progressed, I iterated on both the circuit and the code, troubleshooting issues and refining the system until it produced usable output.
Project Successes and Failures
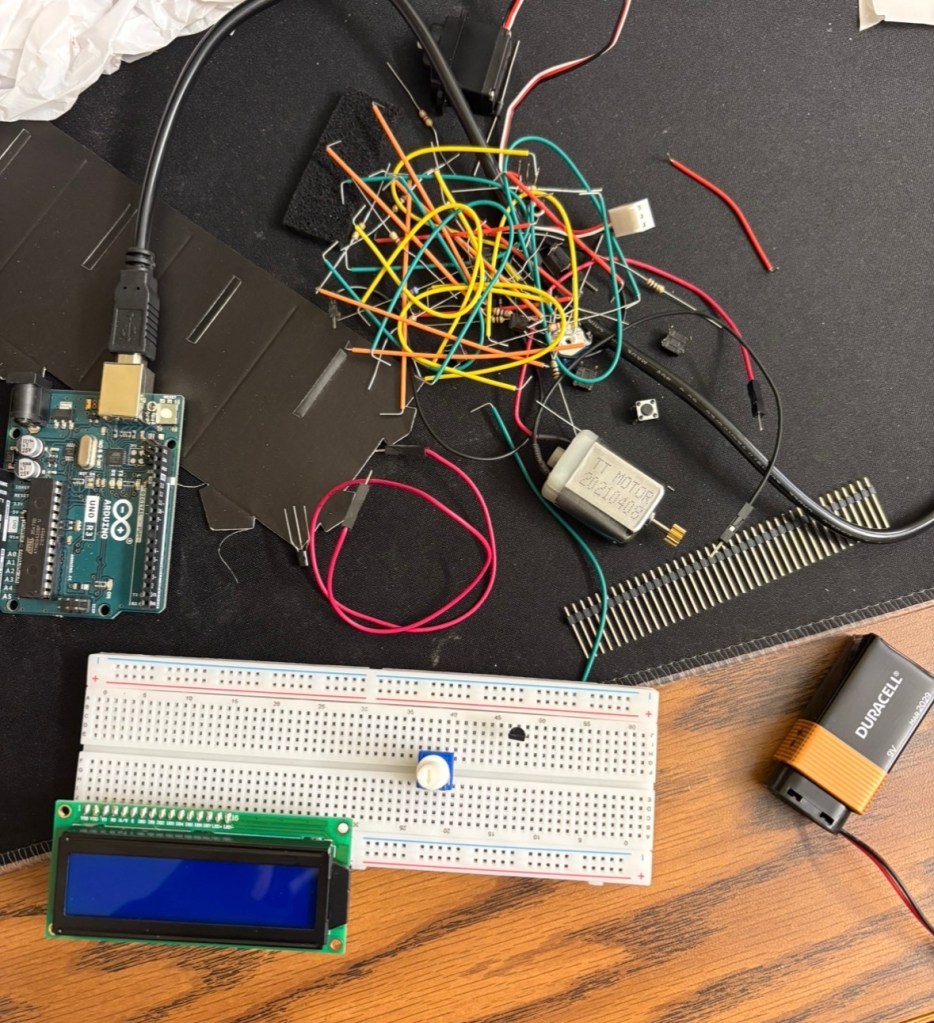
Throughout the project, I encountered several challenges that required systematic debugging. One of the initial issues was incorrect LED polarity, which prevented the output indicator from functioning. After correcting the wiring, the display powered on, but no meaningful data was shown.
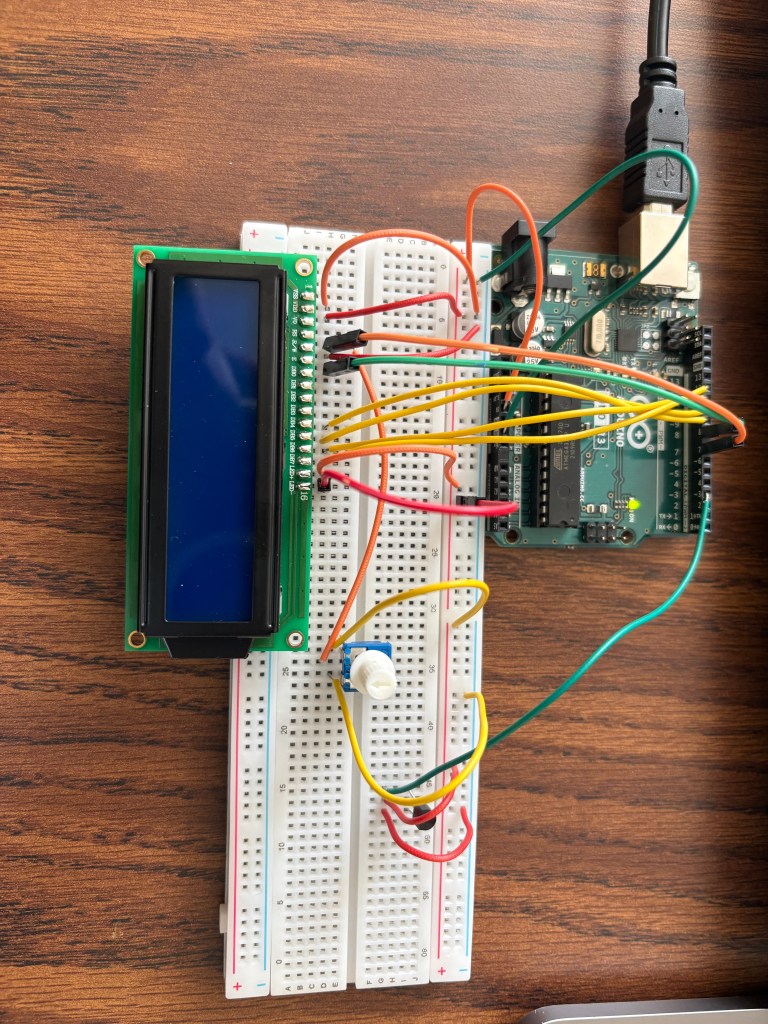
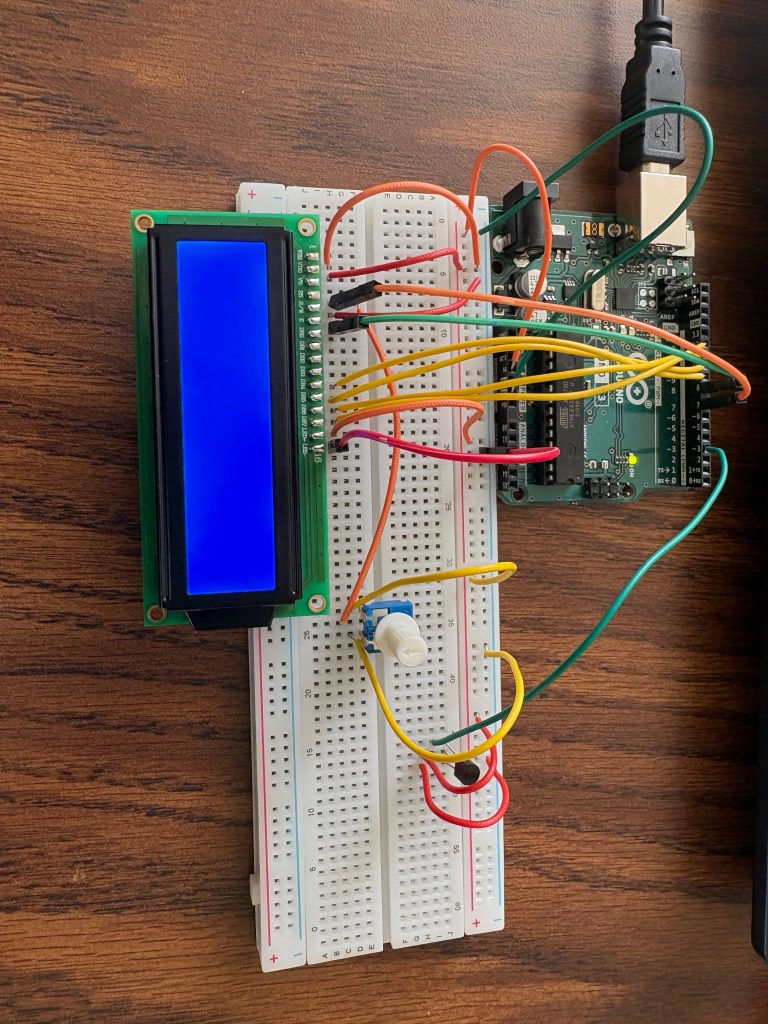
Another issue arose from attempting to use a potentiometer for display contrast control, which proved incompatible with the setup. Removing the potentiometer and directly grounding the contrast pin resolved the visibility issue.
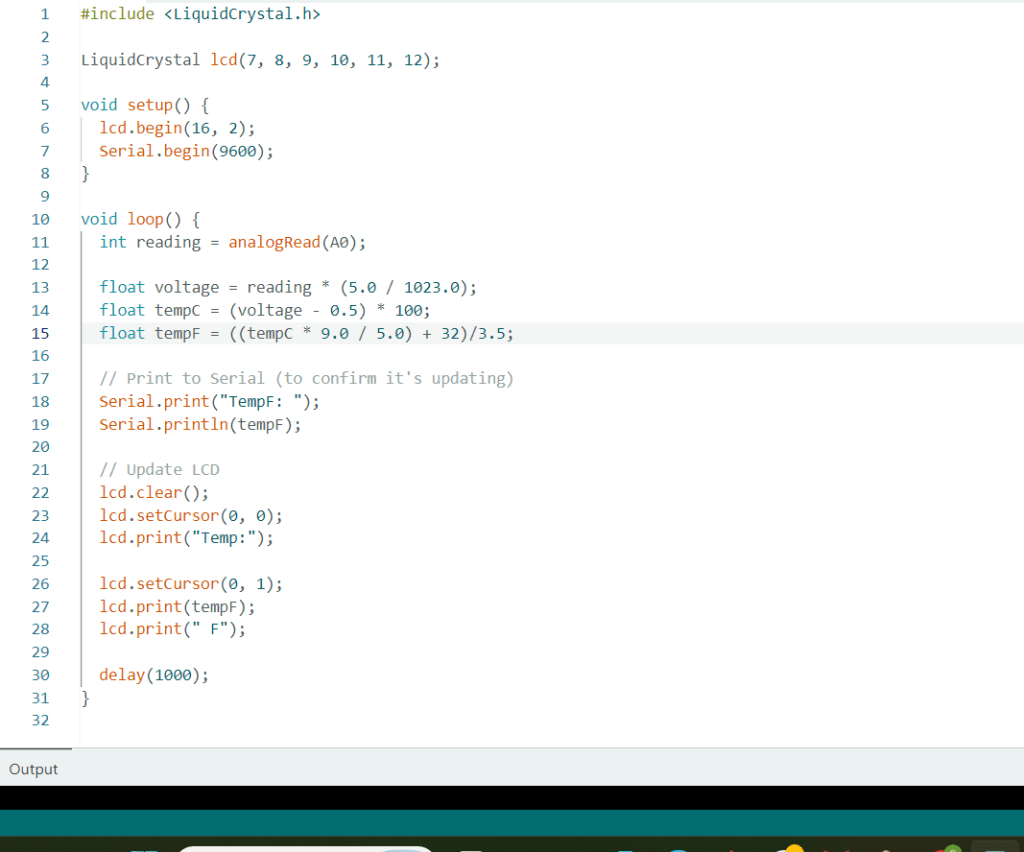
A more significant challenge involved inaccurate temperature readings. The sensor initially produced values that were far higher than expected. To address this, I experimented with voltage readings, checked wiring polarity, and tested the sensor output through multiple debugging approaches. When hardware-level troubleshooting did not fully resolve the issue, I revisited the software and adjusted the conversion logic in the code. This ultimately resulted in more accurate temperature readings.
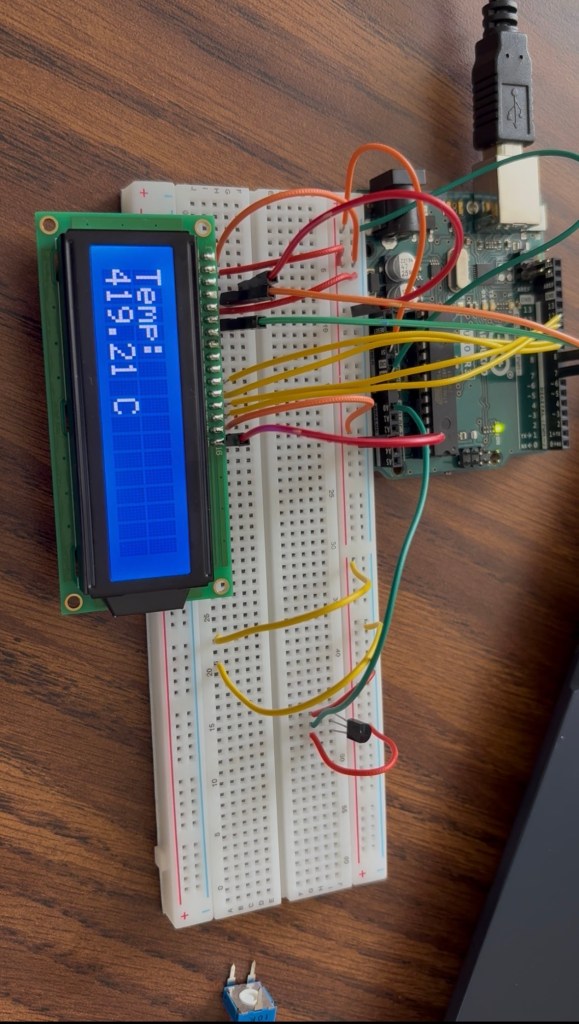

Although the readings still exhibited fluctuations, this was likely due to sensor limitations or environmental noise, which is common in low-cost analog sensors.
ECE Skills Gained
This project helped me develop several foundational electrical and computer engineering skills:
- Circuit Design and Breadboarding: I gained hands-on experience building and debugging circuits, including identifying polarity issues and ensuring proper connections.
- Sensor Interfacing: I learned how analog sensors output voltage signals and how these signals can be interpreted by a microcontroller.
- Embedded Programming: Writing Arduino code strengthened my understanding of analog-to-digital conversion and data processing.
- Debugging Techniques: I developed a structured approach to troubleshooting, including isolating hardware vs. software issues and validating signals step-by-step.
Final Thoughts
Overall, this project was a valuable introduction to building and troubleshooting a real-world system. It showed me that even simple circuits can behave unpredictably, and that problem-solving often requires patience and multiple iterations. While I was able to get the temperature sensor working, the fluctuations in the readings made it clear that accuracy is just as important as functionality.
If I were to continue this project, I would focus on improving the stability of the readings using simpler and more practical approaches. For example, I could average multiple readings in the code instead of relying on a single value, which would help smooth out sudden spikes. I would also consider redesigning the physical setup by creating a small CAD enclosure to house the circuit. Using an insulating material could help shield the sensor from environmental disturbances, such as airflow or rapid temperature changes, leading to more consistent results.
Additionally, I would explore switching to a more reliable and stable temperature sensor, since the one I used appears to be very sensitive to external factors and produces inconsistent outputs. Overall, this project strengthened my interest in embedded systems and showed me how important it is to consider both the hardware environment and component selection when designing accurate and reliable systems.
